Definitions and Examples#
Definitions#
About Database#
The database in P-touch Editor 6 is the original data in a CSV file used to fill text and barcode objects in the label.
About assigning#
This refers to inserting database fields into a layout.
Label to be created#
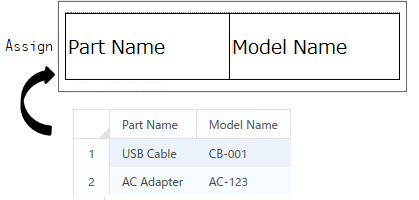
↓
Printed labels#
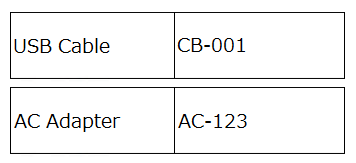
Objects created by inserting fields into a layout are called “merged objects” (“Part Name” and “Model Name” shown above).
Each row of data read from an Excel or CSV file is called a “record”.
The object data selected for editing is called “field data”.
Examlple#
Connecting or disconnecting a database#
Connecting a database#
Connect a database to the layout.
Only one database file can be connected to a single layout.
- Click the [Database] button.
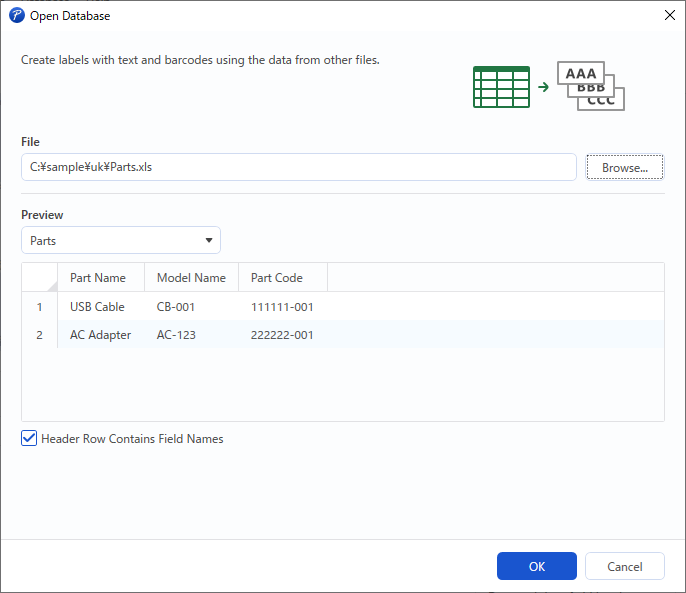
- The [Open Database] dialog box appears.
- Click the [Browse...] button.
Browse to the folder containing the file you want.
Note: you can drag and drop the file onto the file path text box to see the path of that file. - Double-click the file you want to use.
Note: the supported file name extensions are .xls, .xlsm, .xlsx, .csv and .txt. - To display the first database record in the header row of the preview, select the [Header Row Contains Field Names] checkbox.
If the checkbox is cleared, “F1”, “F2”, and so on, appears in the header row. - Click the [OK] button.
Changing to a different database#
The database connected to the layout can be changed to a different one. Only one database file can be connected to a single layout.
- Use any of the following methods to display the [Open Database] dialog box.
・Click the [Database] button.
・Click the [...] button in the database area, and then select “Open Another…”. - See Connecting a database for guidance on how to select a database.
Disconnecting the database#
- Click the [...] button in the database area, and then select “Close”. When a confirmation message appears, click "OK" to confirm that you want to disconnect the database.
Database area#
The records and field data in the currently selected database file are listed.
The records are in the left column, and the fields are in the top row.
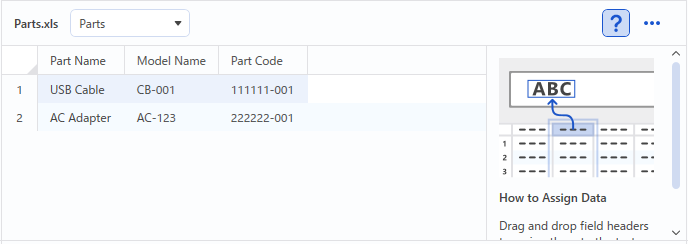
If the [Header Row Contains Field Names] checkbox was selected when the database was connected, the first record in the database appears as field names.
Drag and drop a field name onto the label editing area to create an object linked with that field.
The outcome depends on where the field name is dropped.
-
If it is dropped on an object that can be linked with the database, the existing data is replaced with the data from the database and linked with the dragged and dropped field.
If, when the field name is being dragged, the pointer moves over an object that can be linked with the database, that object is highlighted. -
If it is dropped on an object that cannot be linked with the database, or if it is not dropped on an object, a text object linked with the dragged and dropped field is added.
Database Field#
A list of the database fields for each object appears.
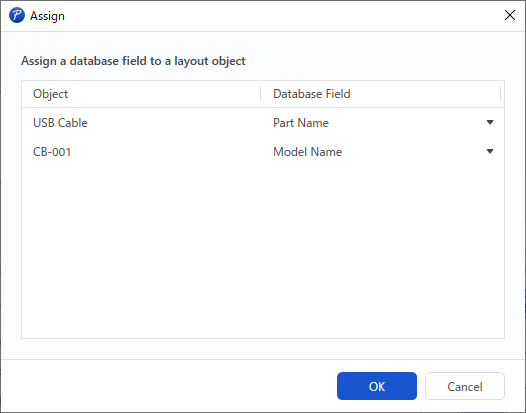
-
Object column
This lists the objects in the open layout that correspond to the connected database.
If the displayed object name is for a text object, the specified text appears.
If it is for a barcode object or arranged text, the specified object name appears. -
Database Field column
Displays the field names in the connected database.
If no database fields have been specified, “(None)” is displayed under "Database Field".